Wednesday, May 11, 2011

A real camera made from sewing spools, eyeglass lens, rubber bands, toilet paper tubes and cardboard/glue

This was just so interesting I had to share.  I know it's not a tutorial like I usually post, but it's definately creative and very fascinating.  I sometimes wonder how we would re-create technology if it were all destroyed one day and we had to start from scratch?  This guy figured out how to re-create a real camera that works....with found objects:


MIROSLAV TICHY HAS BECOME FAMOUS in spite of his need for privacy. Born in 1926 in what is now the Czech Republic, Tichy studied painting at the Academy of Art in Prague until the Communist takeover in April 1945. Arrested for being “odd,” therefor subversive, Tichy spent many years in jails and prisons, until he was released in the 1970s.

Upon his release, he wandered his small town in rags, pursuing his occupation as an artist photographing the female form in the streets. He made his cameras from tin cans, childrens spectacle lens and other junk he found on the street. He would return home each day to make prints on equally primitive equipment, making only one print from the negative he selected. He stole intimate glimpses of his subjects through windows and the fences of swimming pools as well as in the streets, sometimes finding himself in trouble with the police.

Visit this guy's blog - he writes aobut Tichy and shows you some of Tichy's photographs:
http://accidentalmysteries.blogspot.com/2009/01/voyeuristic-art-of-miroslav-tichy.htm

Sunday, May 1, 2011

May Flowers! Out of recycled water bottles...who knew???

I will never look at the bottom of a plastic water bottle the same. Now I will see a potential flower everytime!

Click on this easy tutorial (BELOW THIS PHOTO) to view in a browser and zoom in to read. Or print it!

This crafter made a necklace from them...I'm making barrettes! ;-)


CLICK BELOW

Wednesday, April 20, 2011

Paper Garlands - ahhhh, easy AND pretty!

I found this easy tut in a Better Homes Do It Yourself mag for Summer 2011.

They'd be cool for a party or home decor:


Thursday, April 7, 2011

Farmgirl Stitches

This is from the book, "MaryJane's Stitching Room".

I liked the simplicity of the stitches for embroidery work. Note she uses the phrase, "gussy up". True farmgirl venacular. ;-) Anyway, the book has some cute stitching projects and tips in it like this one:

Monday, March 28, 2011

DIY - ruffled t-shirt in 9 steps!


1. Take a large T-shirt and lay it down flat.
2. Fold the T-shirt in half lengthwise and mark the front, center with a pin on the collar.
3. Pinch a fold in the center of the shirt, about 1 inch deep creating a pleat. Pin the pleat vertically (from the collar to the hemline) so that it stays in place.
4. Repeat until you have 4 pleats in the front, center of the t-shirt.
5. Starting from the bottom hem of the T-shirt, sew a horizontal line from right to left, sewing over the pleats so that they are facing the left.
6. Four inches above that line, sew another horizontal line, this time from left to right, sewing the pleats down so that they are facing the right.
7. Repeat the horizontal lines until reaching the collar of the shirt.
8. Okay…almost done! Now, using a zigzag stitch sew two large “S” shapes, starting from the collar, down to the hemline, feeding the t-shirt fabric into the stitches to create tiny gathered pleats into the stitches.
9. Now, if you like the look of this top as a tank, cut off the sleeves around the sleeve hemline to get this edgy look.


- Tutorial from www.supernaturale.com

Thursday, March 24, 2011

70's flowers

After my daughter turned in her 1970's fashion poster, she inspired me to get dig through my fabric scraps and make a few 70's-style fabric flowers.

I cut three flowers shapes out and sewed them together for each flower. Simple.

They kind of look like polyester butterflies.

Maybe I'll make them into pins? Put them on our jackets (yes, we are still wearing jackets in Ohio) and pretend it's Springtime. ;-)

Tuesday, March 22, 2011

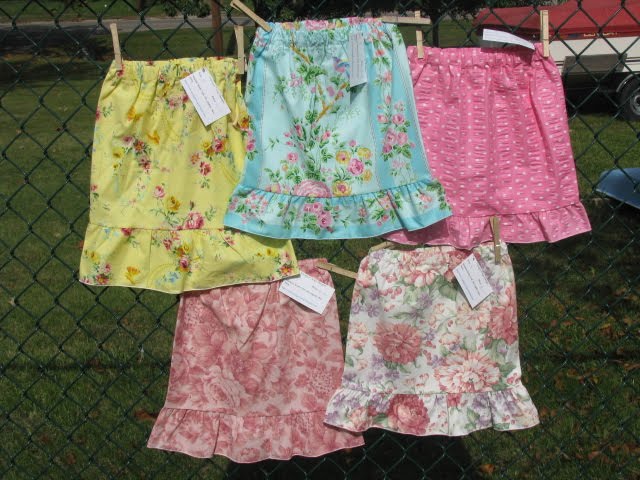
Sweet, Simple Spring Skirt for Girly Girls!


Please visit Debbie's blog to view the complete tutorial. I've included her instructions below:
http://squigglytwigs.blogspot.com/2010/08/tuesdays-tute-sweet-and-simple-skirt.html


Materials:

Measuring Tape
Fabric-Do measurements and calculations before buying fabric.
Elastic-Enough 3/4" non-roll elastic to around the waist of the wearer.
Thread and sewing supplies
Large paper (optional)-if you want to create a paper pattern to make future skirts quicker.
Directions:

Measure Wearer:
1.Waist:________
2.Hip: __________
3.Length of skirt (outseam):_______ How much of this do you want to be the ruffle?:_______

Work the formula:
1. Skirt: hip + 4 X 1.5 (A-line like) or X 2 (more fullness)=___A_________ (or you can measure the bottom of a favorite dress or skirt and use that measurement for A)
2. Completed length – ruffle + 2" for casing and seam = ___B________
3. Ruffle: A x 1.5= __C_________
4. Ruffle length + 1” for seam and hem = ____D_________
You will want to write down these numbers for future use, or make a paper pattern.

Cut Skirt Pieces:
You need to cut a rectangle(s) of fabric that is A (wide) by B (long).
Cut Ruffle Pieces:
And cut a rectangle(s) of fabric that is C (wide) by D (long).
Pay attention that any directional print is right side up.

Time to press (iron):
Press the top edge, of skirt, down 1/4" then 1 1/4" more to form lines for casing.
Press bottom edge, of ruffle, up 1/4" and then 1/4" more to form lines for hem.
See our tutorial on hemming to make this go much quicker.

Time to sew:

Create Large Rectangles:
If you have more than one skirt rectangle, sew one set of short sides together (wrong sides together) to create one larger rectangle. Do the same for the ruffle.
Hem Ruffle:
Sew the hem of the ruffle.
Gather:
Set your machine to gather: large top tension number, large stitch number.
Sew a gathering (basting) stitch along the top edge of the ruffle.
Attach Ruffle and Skirt (in the flat):
Lay skirt right side up on a flat surface. Tape bottom edge down securely.
Lay ruffle wrong side up on top of the skirt, matching raw edges. Tape it down securely.
Pull up top gather thread until ruffle width matches skirt width. Pin if you want.
Sew ruffle to skirt with right sides together. Zigzag edges.
Sew Side Seam:
Open pressed edges up flat and line up side edges of skirt, with right sides together. Sew side seam to make a circle.
Make Casing for Elastic:
Fold pressed edge (top for casing) back in place.
Sew around the bottom edge of the top pressed area (wrong side) to form a casing for the elastic. Leave 1-2" opening near the back to insert the elastic.
Elastic:
Cut a piece of elastic: Waist – 2” = ______ elastic length
Thread elastic through casing. I put a safety pin in one end of the elastic and pin the other end to the skirt. Then pull the elastic through the casing. Fit the skirt to the wearer to check the elastic fit. Overlap the ends of the elastic and sew through 2-3 times. Tuck the elastic end into the casing and close the opening.

Your skirt is finished...Please Repeat and Share!
Happy Sewing!
Debbie

My Blog List

Thank you for visiting our blog!

Visit our website for fun, girly fashion! http://www.paperandtwinecraftydesign.com